The ancient Egyptians had one wish... they wished they could live forever.
They believed pharaohs would need their bodies in the afterlife so, they'd
mummify the pharaohs' bodies to prevent them from decomposing and rotting
away. Learn about their mummification process with this integrated science,
social studies, and STEM project. Keep reading to learn more!
If you are looking for my list of children's books about mummies, it is now
a separate blog post. You can find the list at Six Children's Books About Egyptian Mummies.
Disclosure: Affiliate links to Amazon are included in this post.
Making a mummy was a long and tedious process that could take months to complete. First, the body was packed in a salt called natron. This allowed the body to dry out and for the moisture to be removed. Once it was completely dry, the body was covered with scented spices and oils, then wrapped in cloth. Finally, the body... now called a mummy... would be placed in a coffin and buried in its final resting place.

How to Make a Mummy Directions
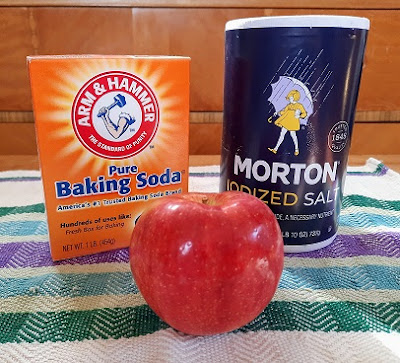
You will need:- salt
- baking soda
- apples
- sandwich bag
- optional: silica gel packs

Step One
Take an apple and carve a face into it. Peeling the apple is
optional. If you peel the apple, it will look different from the
photos in this post... but no worries... you'll still be able to make a
unique-looking apple mummy!
Possible STEM extension: Use a combination of peeled and unpeeled
apples and observe their changes throughout the mummification process.

Step Two
Put the apple in the sandwich bag. Combine one part salt to one part
baking soda and pour the mixture over the apple. Shake well until
all moist areas are covered. Set aside in a cool dry place for a
week. You can look at the apple during that time, but do not open
the bag.
Note: Someone told me you can toss little silica gel packs... the
kind that comes in medicine bottles... into the bag to speed up the
process. I've never tried it, but am curious if it works or
not. If you try it, please let me know if they make a difference!

This photo shows how the salt and baking soda will stick to the moist
areas of the apple as it dehydrates. Be sure to put enough salt and
baking soda into the bag to cover the whole apple.
Week One
When the week is over, remove the apple from the bag and carefully brush the
salt and baking soda off of it. Throw out the salt and baking soda
that's in the bag. How does the apple look? How does it
smell? How does it feel? If you can see, smell, and feel
moisture left in the apple, put it back into the bag with some fresh baking
soda and salt. Check it again in another week.

Week Two
After two weeks in the salt and baking soda, our red delicious apple looks
more like a prune than an apple. The apple isn't as squishy as it was
last week, but it still has some softness to it. I took my friend's
advice and threw some silica gel packs into the bag and it definitely
helps. The only drawback... some of the ink from the gel packs got
onto the apple. The green you see in the apple's left eye isn't
moldy... it's ink. Since there's still some moisture left in this
apple, I'm putting it back into the back with some salt, baking soda, and
more silica packs. One more week!

Remember... it took MONTHS to make a real mummy.
Week Three
After three weeks, the apple continues to look more like a prune than an
apple. When I took the apple out of the bag, its wrinkles were caked
with salt and baking soda. I tried to brush that salt and baking soda
off it, but they wouldn't come off.

Since the salt and baking soda couldn't be wiped off easily, I rinsed the
apple with some running water. Now it really looks like a prune!

After three weeks, these apple mummies are ready to be sent home with your
students. They aren't completely mummified, but they are mummified
enough for your students to have grasped the concept of how mummies are
made. Of course, you can continue the process of keeping the apple in
salt and baking soda for a few more weeks if you'd like. But I'm going
to call it done for this blog post. Stay tuned for
part two of this experiment
in which I show what happens when an apple is completely mummified!
UPDATE: Part two of this experiment is ready.
Click here
to check it out!

To learn more about how mummies are made, watch the video below by Fast Facts:

Did you enjoy learning how to make a dried apple mummy? If so, check out these
other blog posts about more STEM-related books and activities:
- Book List: Six Children's Books About Egyptian Mummies
- Book + STEM: Pumpkin Life Cycle STEM Activity
- STEM: Pepper and Soap STEM Experiment
- Fun Facts: Fun Facts About Camels
- Book + STEM: The Night Before St. Patrick's Day by Natasha Wing + Leprechaun Traps
- Book + STEM: It Came from Under the High Chair: A Mystery by Karl Beckstrand


No comments:
Post a Comment
Note: Only a member of this blog may post a comment.